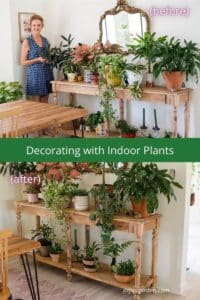
A new year brings feelings of cleaning out, cleaning up, redoing, and freshening up. I haven’t tackled the bedroom closet yet, but when it has anything to do to plants, I’m on it in a heartbeat. Decorating with indoor plants is big time fun, and I want to share with you how I restyled the long, narrow table in my dining room/living room.
I love this table and it’s the bee’s knees when it comes to displaying some of my smaller plants. I moved into a new house last year, and a mish mash of pots and knick knacks ended up on this table and never moved.
My previous home had fewer windows and didn’t receive the generous amount of sunshine that my new home does. The pots I collected since moving to Tucson 5 years ago were much brighter and more colorful. I decided to go with a more natural color scheme with black as an accent. I have mountain views from every window in the house (except for 1!), lots of natural light, and lots of nature outside so this is the big draw now.
I have plenty of plants to move around and decorate with but wanted a few new pots. I bought some in similar materials and shapes to make things a bit more cohesive over all. Matchy-matchy wasn’t what I was going for, just a pleasing mixture.
Most pots were purchased locally but I did buy a few online. You’ll find a collage showing the materials and products used for this project (or a similar product) along with with links where to buy them at the end of this post.
What color and type of pots you go with is up to you. Decorating with indoor plants is just like interior design, it’s a matter of your taste and what you find pleasing. If all white pots is what you like, go for it. If you like bright colors and patterns are your thing, carry on!
The plants choice you have to be much more mindful of. You want to make sure the plants are in spots in your home where they’ll do well. Exposure is key when it comes to indoor plant placement. We have a lot of information about houseplants on our website that you can reference.
Plant styling in action:

Decorating With Indoor Plants – the simple steps
The process of arranging these plants and pots is like cleaning out your closets. Take everything out, and go from there. I think it’s best to describe how I did this step by step. Watching the video works too.
I bought a few new pots in 6″ and 8″ sizes. They were going to set the style for the table. If I didn’t use all of them here, they’d be used elsewhere. Turns out I only had 1 of the tan clay pots leftover.
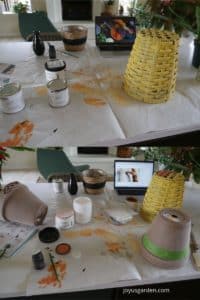
I painted and decorated 4 of the pots and baskets.
All the plants were taken off the table top and bottom and put on the dining room table. I thoroughly cleaned the table and the floor behind it. Who knows when this will ever be done again!
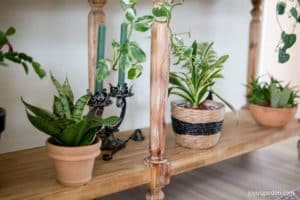
I started putting the plants and the pots back on the table. I decided to go with fewer plants so it didn’t look so crowded and smushed together. I have a few black features in this space (which you’ll see in the video) and decided to keep the accents of black on the bottom shelf.
Make sure you know where plants are going and that they’re in the right exposure before you start playing arouund with the pots. In the photo below the Rubber Plant and Agalonema Lady Valentine On the left) get more light from a nearby south window than the Satin Pothos and Aglaonema Maria on the opposite end.
I kept the color palette earthy and somewhat neutral on the top shelf because quite a few of the plants are variegated. The Aglaonema Lady Valentine (the pink plant) really steals the show!
I switched around a few of the pots until I was happy with the look.


 100vw, 719px” data-pin-media=”https://www.joyusgarden.com/wp-content/uploads/2022/01/3-2.jpg” data-lazy-src=”https://www.joyusgarden.com/wp-content/uploads/2022/01/3-2-300×200.jpg” data-pin-description=”Houseplants are beautiful, living home decor. Decorating with indoor plants & decorating with houseplants is fun. These indoor plant decoration ideas include how to arrange indoor plants, styling with indoor plants, & plant styling. Indoor plants arrangement ideas are good to get us inspired. See how I style plants on a table in my living room/dining room. Get indoor plant decor ideas & see houseplant decor here. Indoor plant decor adds so much to our homes!” data-pin-title=”Decorating With Indoor Plants: How To Style Plants On A Table” /></a></p>
<div id=)
 100vw, 711px” data-pin-media=”https://www.joyusgarden.com/wp-content/uploads/2022/01/6.jpg” data-lazy-src=”https://www.joyusgarden.com/wp-content/uploads/2022/01/6-200×300.jpg” data-pin-description=”Houseplants are beautiful, living home decor. Decorating with indoor plants & decorating with houseplants is fun. These indoor plant decoration ideas include how to arrange indoor plants, styling with indoor plants, & plant styling. Indoor plants arrangement ideas are good to get us inspired. See how I style plants on a table in my living room/dining room. Get indoor plant decor ideas & see houseplant decor here. Indoor plant decor adds so much to our homes!” data-pin-title=”Decorating With Indoor Plants: How To Style Plants On A Table” /></a></p>
<div id=)
 100vw, 716px” data-pin-media=”https://www.joyusgarden.com/wp-content/uploads/2022/01/1-2.jpg” data-lazy-src=”https://www.joyusgarden.com/wp-content/uploads/2022/01/1-2-300×200.jpg” data-pin-description=”Houseplants are beautiful, living home decor. Decorating with indoor plants & decorating with houseplants is fun. These indoor plant decoration ideas include how to arrange indoor plants, styling with indoor plants, & plant styling. Indoor plants arrangement ideas are good to get us inspired. See how I style plants on a table in my living room/dining room. Get indoor plant decor ideas & see houseplant decor here. Indoor plant decor adds so much to our homes!” data-pin-title=”Decorating With Indoor Plants: How To Style Plants On A Table” /></a></p>
<div id=)
 100vw, 710px” data-pin-media=”https://www.joyusgarden.com/wp-content/uploads/2022/01/2-2.jpg” data-lazy-src=”https://www.joyusgarden.com/wp-content/uploads/2022/01/2-2-300×200.jpg” data-pin-description=”Houseplants are beautiful, living home decor. Decorating with indoor plants & decorating with houseplants is fun. These indoor plant decoration ideas include how to arrange indoor plants, styling with indoor plants, & plant styling. Indoor plants arrangement ideas are good to get us inspired. See how I style plants on a table in my living room/dining room. Get indoor plant decor ideas & see houseplant decor here. Indoor plant decor adds so much to our homes!” data-pin-title=”Decorating With Indoor Plants: How To Style Plants On A Table” /></a></p>
<div id=)
 100vw, 687px” data-pin-media=”https://www.joyusgarden.com/wp-content/uploads/2022/01/5-3.jpg” data-lazy-src=”https://www.joyusgarden.com/wp-content/uploads/2022/01/5-3-200×300.jpg” data-pin-description=”Houseplants are beautiful, living home decor. Decorating with indoor plants & decorating with houseplants is fun. These indoor plant decoration ideas include how to arrange indoor plants, styling with indoor plants, & plant styling. Indoor plants arrangement ideas are good to get us inspired. See how I style plants on a table in my living room/dining room. Get indoor plant decor ideas & see houseplant decor here. Indoor plant decor adds so much to our homes!” data-pin-title=”Decorating With Indoor Plants: How To Style Plants On A Table” /></a></p>
<div id=)
 100vw, 705px” data-pin-media=”https://www.joyusgarden.com/wp-content/uploads/2022/01/Jan-22-LTK-images-7.jpg” data-lazy-src=”https://www.joyusgarden.com/wp-content/uploads/2022/01/Jan-22-LTK-images-7-240×300.jpg” data-pin-description=”Houseplants are beautiful, living home decor. Decorating with indoor plants & decorating with houseplants is fun. These indoor plant decoration ideas include how to arrange indoor plants, styling with indoor plants, & plant styling. Indoor plants arrangement ideas are good to get us inspired. See how I style plants on a table in my living room/dining room. Get indoor plant decor ideas & see houseplant decor here. Indoor plant decor adds so much to our homes!” data-pin-title=”Decorating With Indoor Plants: How To Style Plants On A Table” /></a></p>
<div id=)


